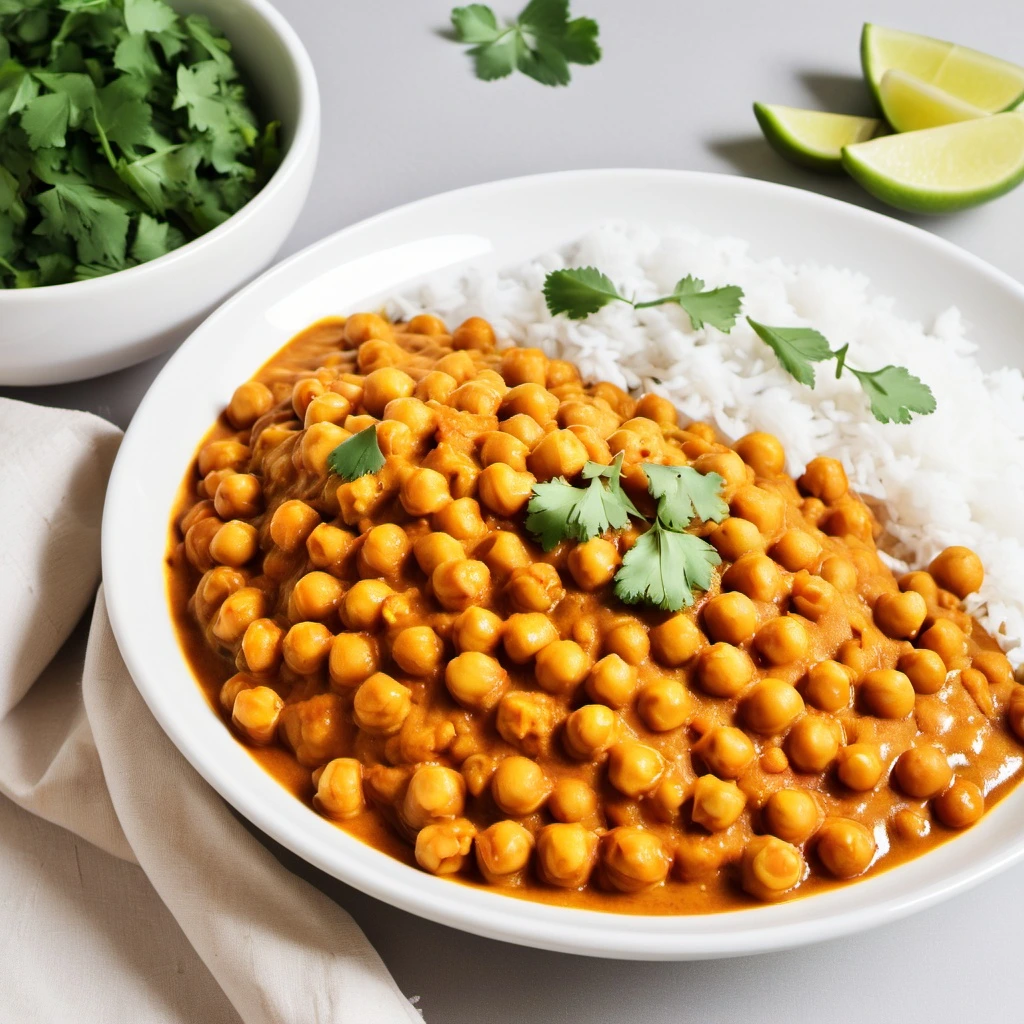
If you’re craving a hearty, flavorful, and easy-to-make meal, look no further than chickpea curry! This dish is a staple in many cuisines, known for its rich spices, creamy texture, and nourishing ingredients. Whether you’re following a plant-based diet or just looking for a quick and satisfying meal, this 30-minute chickpea curry is perfect for busy weeknights.
In this blog post, you’ll learn how to make the best chickpea curry using simple pantry ingredients, plus tips for customizing the recipe to suit your taste. From aromatic spices to the creamiest coconut sauce, we’ll guide you through every step to create a dish that’s bursting with flavor. Let’s get started!
Why You’ll Love This Chickpea Curry
✔ Quick & Easy – Ready in just 30 minutes, perfect for busy weeknights
If you’re looking for a satisfying meal that doesn’t require hours in the kitchen, this chickpea curry is your go-to recipe. With minimal prep and pantry-friendly ingredients, you can have a flavorful dish on the table in just 30 minutes. It’s perfect for busy weeknights, meal prepping, or last-minute dinner plans. Plus, the one-pot cooking method means less cleanup, so you can spend more time enjoying your meal and less time washing dishes!
✔ Healthy & Nutritious – Packed with plant-based protein, fiber, and vitamins
Chickpeas (also known as garbanzo beans) are a nutrient powerhouse! They’re packed with plant-based protein, making this dish a great option for vegans, vegetarians, or anyone looking to eat more plant-based meals. They’re also loaded with fiber, which supports digestion and helps keep you full longer. The addition of spices like turmeric and cumin adds not only bold flavors but also anti-inflammatory and digestive benefits. Pairing the chickpeas with tomatoes, coconut milk, and fresh herbs makes this curry an incredibly balanced meal.
✔ Rich & Flavorful – A blend of aromatic spices and creamy coconut milk
This chickpea curry is anything but bland! The combination of curry powder, garam masala, cumin, turmeric, and coriander creates an incredibly warm, fragrant, and comforting flavor profile. Coconut milk adds a luscious creaminess that balances the spices, while tomatoes contribute a slight tanginess that brings depth to the dish. Whether you prefer a mild or spicy curry, you can easily adjust the seasonings to match your taste buds.
✔ Versatile & Customizable – Adjust spice levels, add veggies, or switch up ingredients
One of the best things about this chickpea curry is how customizable it is. You can:
- Adjust the spice level – Keep it mild or make it fiery with chili flakes or fresh chilies.
- Switch up the protein – Add lentils, tofu, or even roasted cauliflower for variety.
- Boost the veggies – Stir in spinach, bell peppers, zucchini, or sweet potatoes for extra nutrients.
- Make it oil-free – Sauté your aromatics in vegetable broth instead of oil.
- Change the texture – Blend part of the curry for a thicker, creamier consistency or keep it chunky for a hearty feel.
No matter how you customize it, this chickpea curry is guaranteed to be a crowd-pleaser! 😋
Key Ingredients & Best Substitutes
Creating the perfect chickpea curry starts with a handful of wholesome, flavorful ingredients. Here’s what you need and the best substitutes if you want to tweak the recipe!
🥥 Chickpeas (Garbanzo Beans) – Canned or cooked from scratch
Chickpeas are the star ingredient of this dish, offering a hearty texture and plenty of plant-based protein. You have two main options:
- Canned Chickpeas – The quickest and easiest choice! Simply drain and rinse them to remove excess sodium.
- Dried Chickpeas (Cooked from Scratch) – If you prefer homemade, soak them overnight and cook them until soft. This option offers a fresher taste and lets you control the salt content.
Best Substitutes:
- Lentils – Green or brown lentils work well for a slightly different texture.
- Butter Beans or Cannellini Beans – A creamier alternative for a softer consistency.
- Tofu or Cauliflower – For a different protein source, you can add cubed tofu or roasted cauliflower.
🍅 Tomatoes & Coconut Milk – Balance acidity and creaminess
The combination of tomatoes and coconut milk creates the rich, flavorful base of this curry.
- Tomatoes – Provide acidity and depth. You can use fresh tomatoes, canned diced tomatoes, or tomato purée for a smoother texture.
- Coconut Milk – Adds a creamy, slightly sweet contrast that balances the spices. Opt for full-fat coconut milk for a richer curry or lite coconut milk for a lighter version.
Best Substitutes:
- Tomatoes: If you don’t have fresh or canned tomatoes, use tomato paste mixed with water for a concentrated flavor.
- Coconut Milk: Try cashew cream, oat milk, or almond milk for different levels of creaminess. You can also use vegan yogurt for a tangier twist.
🌶 Aromatic Spices – Curry powder, cumin, turmeric, garam masala
Spices are what give this dish its deep, complex flavors. The essential ones include:
- Curry Powder – A blend of spices that provides a warm, slightly sweet, and earthy flavor.
- Cumin – Adds a nutty and slightly smoky aroma.
- Turmeric – Enhances the color and offers anti-inflammatory benefits.
- Garam Masala – A fragrant finishing spice mix that adds depth and warmth.
Best Substitutes:
- If you don’t have garam masala, mix cinnamon, nutmeg, and cloves as an alternative.
- No curry powder? Use a blend of coriander, cumin, turmeric, and paprika.
- Fresh ginger and garlic can enhance the flavor if you want a fresher taste.
🥬 Veggie Add-Ins – Spinach, bell peppers, potatoes, or carrots
Adding vegetables not only boosts the nutrition of this dish but also enhances the texture and color. Some great options include:
- Spinach or Kale – Stir in fresh greens at the end for added vitamins and a vibrant color.
- Bell Peppers – Provide a slight sweetness and crunch.
- Potatoes or Sweet Potatoes – Make the curry heartier and more filling.
- Carrots or Peas – A touch of natural sweetness balances the spices.
Best Substitutes:
- Use zucchini, eggplant, or green beans if you want to switch it up.
- Add chopped mushrooms for an umami boost.
- Try pumpkin or butternut squash for a slightly sweeter, more autumnal variation.
By combining these core ingredients with the right substitutes, you can make your chickpea curry unique and tailored to your taste!
Step-by-Step Guide to Making Chickpea Curry
Making chickpea curry at home is simple and rewarding! Follow these step-by-step instructions to create a rich, aromatic, and creamy dish in just 30 minutes.
🔹 Step 1: Sauté the Aromatics – Cook onions, garlic, and ginger until fragrant
The first step to building deep, irresistible flavors is sautéing the aromatics. This helps release their natural sweetness and intensifies the taste.
- Heat a tablespoon of oil (olive oil or coconut oil) in a large pan over medium heat.
- Add chopped onions and sauté for about 3–5 minutes, stirring occasionally, until they become soft and translucent.
- Stir in minced garlic and freshly grated ginger, cooking for another minute until fragrant. Be careful not to burn the garlic, as it can turn bitter.
💡 Tip: If you want to make this oil-free, sauté the aromatics in a splash of vegetable broth instead of oil.
🔹 Step 2: Add Spices & Tomatoes – Enhance depth of flavor with warm spices
Once your aromatics are softened and fragrant, it’s time to bring in the spices and tomatoes for a flavorful base.
- Sprinkle in curry powder, cumin, turmeric, and garam masala. Stir well and let the spices toast for 30 seconds to 1 minute. This enhances their aroma and depth.
- Add diced tomatoes (fresh or canned) and a pinch of salt. Cook for 5 minutes, stirring occasionally, until the tomatoes break down and blend into the mixture.
💡 Tip: If you prefer a smoother curry, you can blend the tomato mixture before proceeding to the next step.
🔹 Step 3: Simmer with Chickpeas & Coconut Milk – Create a rich, creamy base
Now, it’s time to bring the dish together with chickpeas and coconut milk!
- Add drained and rinsed chickpeas to the pan, stirring well so they absorb the flavorful tomato-spice mixture.
- Pour in coconut milk (full-fat for a creamier texture or light for a healthier option). Stir everything together.
- Reduce heat to low-medium and let it simmer for 10–15 minutes, allowing the flavors to meld and the curry to thicken. Stir occasionally to prevent sticking.
💡 Tip: If the curry is too thick, add a little vegetable broth or water to adjust consistency.
🔹 Step 4: Garnish & Serve – Top with fresh cilantro, lime juice, or chili flakes
Before serving, elevate the flavors with a few finishing touches!
- Stir in a squeeze of fresh lime juice for brightness and balance.
- Sprinkle fresh chopped cilantro on top for a burst of freshness.
- If you like some heat, add chili flakes or sliced red chilies for extra spice.
Serving Suggestions:
- Serve with steamed basmati rice, naan bread, or quinoa for a complete meal.
- Pair with a side of cucumber raita or mango chutney for a cooling contrast.
💡 Tip: This curry tastes even better the next day as the flavors deepen! Store leftovers in the fridge for up to 4 days or freeze for later use.
Now you’re all set to make the best chickpea curry at home!
Tips & Variations for the Perfect Chickpea Curry
Want to take your chickpea curry to the next level? Whether you like it spicy, thick, protein-packed, or paired with the perfect side, these tips and variations will help you customize your dish just the way you like it!
💡 Make It Spicier – Add red chili flakes or fresh green chilies
If you love a spicy kick, there are several ways to heat things up:
- Red chili flakes – Sprinkle in ½ to 1 teaspoon while cooking.
- Fresh green chilies – Slice and add them along with the onions for an authentic heat.
- Cayenne pepper – A pinch will intensify the spice without altering the flavor.
- Spicy curry paste – Mix in a teaspoon of Thai red or Madras curry paste for an extra boost.
🔥 Tip: Start with a little and add more as you go—it’s easier to increase spice than to fix an overly spicy dish!
💡 Thicker or Thinner Curry? – Adjust coconut milk or simmering time
The texture of your chickpea curry can be easily adjusted depending on your preference:
- For a thicker curry:
- Let it simmer uncovered for an additional 5–10 minutes.
- Mash some of the chickpeas with a fork to create a thicker consistency.
- Use less coconut milk or substitute with a thicker plant-based yogurt.
- For a thinner curry:
- Add extra vegetable broth or water (¼ cup at a time).
- Use light coconut milk instead of full-fat for a lighter texture.
- Cover the pan while simmering to retain moisture.
💡 Tip: If your curry thickens too much when stored, simply add a splash of water when reheating.
💡 Protein Boost – Stir in tofu, lentils, or quinoa
Make your curry even more nutritious and filling with a protein-packed twist:
- Tofu – Cube and stir in firm or extra-firm tofu for a heartier dish. Pan-fry it first for extra texture.
- Lentils – Add ½ cup of cooked lentils for extra fiber and protein. Red lentils blend smoothly into the curry.
- Quinoa – Mix in cooked quinoa for a nutrient-dense, protein-rich boost.
💡 Tip: Adding extra protein makes this a great post-workout meal or a satisfying high-protein vegan dinner!
💡 Serving Ideas – Enjoy with rice, naan, or quinoa for a complete meal
Pairing your chickpea curry with the right side enhances the experience:
- Basmati or jasmine rice – The classic, fluffy pairing that absorbs the curry’s rich flavors.
- Quinoa – A high-protein, gluten-free alternative to rice.
- Naan or roti – Warm, soft, and perfect for scooping up every last bit of curry.
- Cauliflower rice – A low-carb, grain-free option.
- Pita or flatbread – Great for a quick and easy pairing.
💡 Tip: Try serving your curry with pickled onions, coconut yogurt, or a squeeze of lime for an extra burst of flavor!
With these customization options, you can make your chickpea curry exactly the way you love it.
For more vegan meal recipes, you can have a look at our other vegan recipes:
- How to Make Chickpea Masala – A One-Pot Vegan Recipe
- The Best Vegan Pad Thai – A Quick & Healthy Plant-Based Twist
- The Ultimate Hearty Vegan Chili – Full of Protein & Bold Flavors
- How to Make Tofu Pad Thai – Quick & Healthy Recipe
You can also combine with tasty vegan desserts:
- Easy Homemade Gluten-Free Vegan Tiramisu Recipe
- How to Make Vegan Tiramisu – A Creamy & Indulgent Recipe
- How to Make Vegan Lemon Bars – Simple & Sweet Treat
- How to Make Vegan Lemon Blueberry Bread – A Must-Try Recipe
- How to Make Lemon Berry Bread – A Zesty & Moist Recipe
FAQs About Chickpea Curry
Still have questions about making the perfect chickpea curry? Here are answers to some common questions to help you store, reheat, and customize your dish!
❓ Can I make it ahead of time? – Yes! It tastes even better the next day.
Absolutely! Chickpea curry is one of those dishes that gets better over time. The flavors meld beautifully, making it even richer and more aromatic the next day.
- Meal prep tip: Make a big batch and enjoy it throughout the week.
- Best way to reheat: Warm it up on the stove over low heat, stirring occasionally.
- Flavor boost: If needed, refresh the curry with a splash of coconut milk or broth when reheating.
💡 Pro Tip: If you’re serving it later, wait to add fresh herbs and lemon juice until just before eating to maintain their freshness.
❓ How do I store & reheat? – Keep in an airtight container for up to 5 days.
To keep your chickpea curry fresh and delicious, store it properly:
- Refrigeration: Store in an airtight container in the fridge for up to 5 days.
- Reheating options:
- Stovetop: Heat over medium-low heat, stirring occasionally. Add a splash of water or coconut milk if too thick.
- Microwave: Reheat in 30-second intervals, stirring in between until warm.
- Instant Pot: Use the sauté function for quick reheating.
💡 Pro Tip: If storing with rice, keep them separate to prevent the rice from soaking up too much moisture.
❓ Can I freeze chickpea curry? – Absolutely! Freeze for up to 3 months.
Yes! Chickpea curry is freezer-friendly, making it a great meal-prep option for busy weeks.
- How to freeze:
- Let the curry cool completely before transferring it to freezer-safe containers or zip-top bags.
- Leave a little space at the top to allow for expansion.
- Label with the date so you know when to use it.
- How to reheat from frozen:
- Thaw overnight in the refrigerator.
- Heat in a saucepan over medium heat, adding a little water or broth if needed.
- If in a hurry, reheat directly from frozen in a covered saucepan on low heat.
💡 Pro Tip: Freeze in individual portions for easy, single-serving meals!
❓ What’s the best way to make it oil-free? – Sauté with vegetable broth instead of oil.
If you’re avoiding oil, you can still make a delicious, flavorful chickpea curry:
- Instead of oil, use vegetable broth or water to sauté onions, garlic, and spices.
- Coconut milk substitution: Use lite coconut milk or a blend of cashew cream for a lighter version.
- Creamy texture without oil: Blend a small portion of the chickpeas and stir it back into the curry for richness without added fat.
💡 Pro Tip: Keep stirring when cooking without oil to prevent sticking, and add a splash of broth as needed!
With these FAQs and tips, you’ll be able to store, reheat, and customize your chickpea curry like a pro!
Conclusion
Making delicious chickpea curry at home has never been easier! In just 30 minutes, you can enjoy a meal that’s rich, creamy, and packed with plant-based goodness. Whether you prefer it spicy, mild, thick, or brothy, this recipe is versatile and customizable to suit your taste.
Now it’s your turn! Try this easy chickpea curry recipe, pair it with your favorite sides, and let us know how it turns out. Don’t forget to share your creations and tag us on social media! 🌱🍛 #VeganChickpeaCurry #PlantBasedEats